Tuna Android SDK#
The Tuna SDK for Android's platforms will allow you to tokenize customer information and collect sensitive card data. In this section, you will find all details needed to configure and use the Tuna's Android SDK in your App.
Getting started: Configuration#
Add Tuna in your build.gradle dependencies, as shown below:
1import com.tunasoftware.tuna.entities.TunaAPIKeyInitialization of the SDK#
In your Application Class:
1import com.tunasoftware.tuna.entities.TunaAPIKey
2
3class YourApplication : Application(){
4
5    override fun onCreate() {
6        super.onCreate()
7        Tuna.init("<your AppToken>")
8    }
9}
Your AppToken is located in the Account Settings section of your Console in the Developer tab.
note
Don't you have a Tuna Account? Click here to start your registration at Tuna.
If you want to use the sandbox environment, you can use the AppToken of the example below. You must also set the sandbox parameter as true.
1import com.tunasoftware.tuna.entities.TunaAPIKey
2
3class YourApplication : Application(){
4
5    override fun onCreate() {
6        super.onCreate()
7        Tuna.init("a3823a59-66bb-49e2-95eb-b47c447ec7a7", sandbox = true)
8    }
9}
Tuna session#
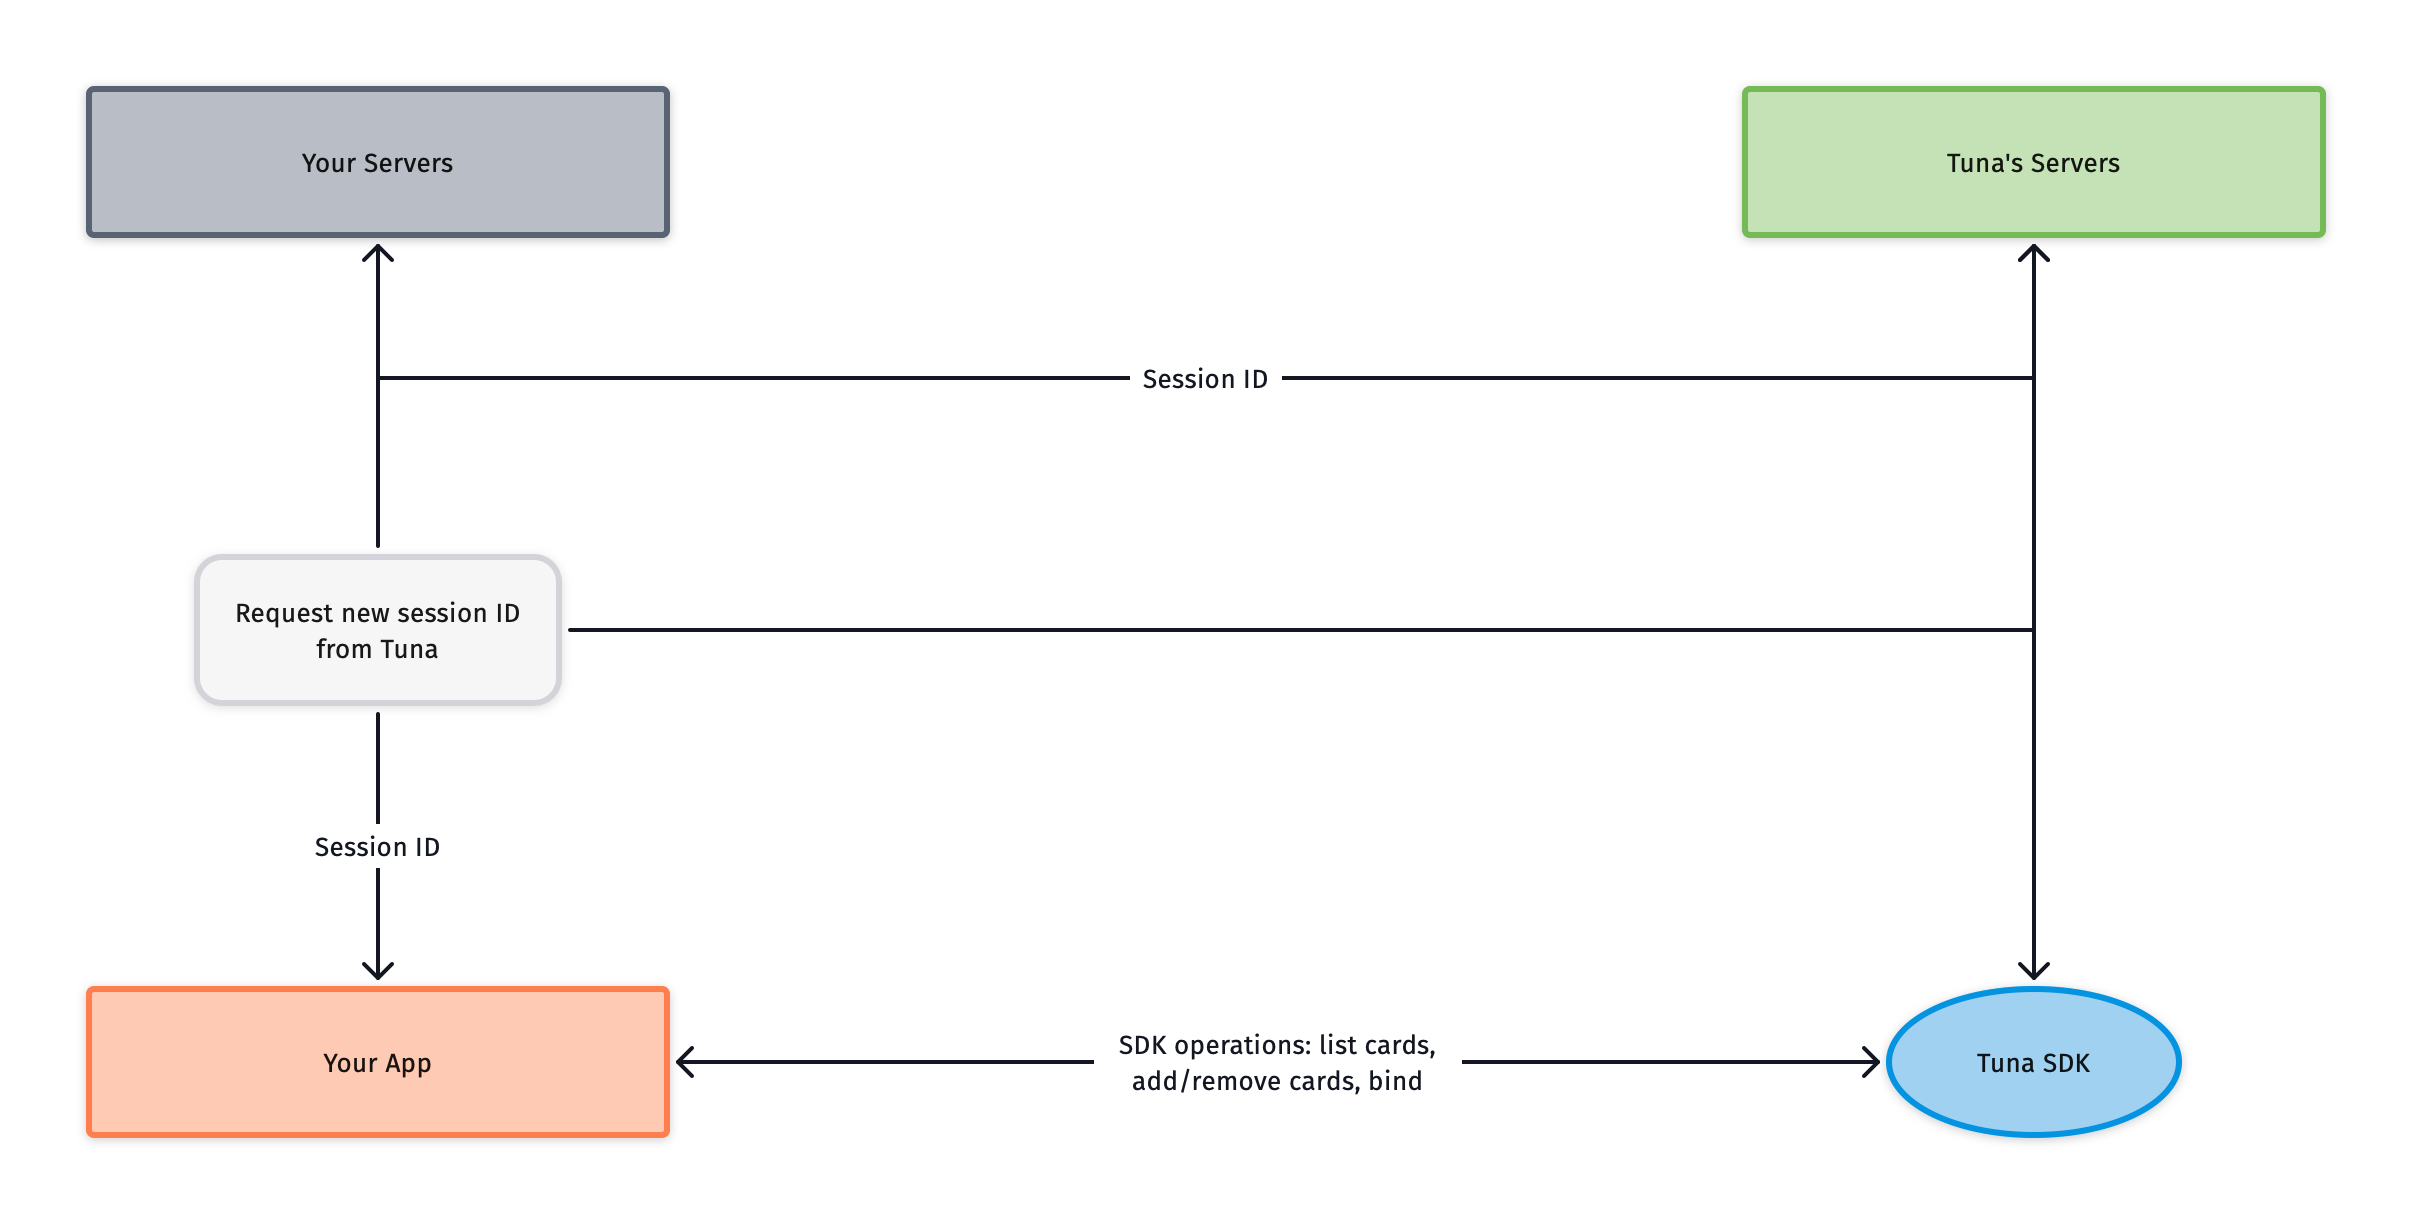
Every interaction with the Tuna APIs happens within a session. Therefore, you must provide a session ID obtained from Tuna to initialize the SDK. This session ID must be negotiated between your server and Tuna's servers for security reasons.
A session initialization looks like this:
- Your app sends a request to your backend;
- Your backend talks to Tuna's servers to generate a new session ID for the customer;
- Tuna's servers send the newly generated session ID to your backend;
- Your backend responds to your app with the new session ID;
- Your app calls the Tuna SDK to set the current session ID.

You do not have to start a session on your app launch. A good trigger to start the session is, for example, when the customer starts your checkout flow.
1import com.tunasoftware.tuna.Tuna
2...
3val sessionId = getSessionIdFromBackend()
4val tunaSession = Tuna.startSession(sessionId)
Session in Sandbox#
If you want to use Tuna's SDK for Android in the sandbox environment, you can start a session without calling your backend.
1Tuna.getSandboxSessionId()
2.onSuccess { sessionId ->
3     // start the sdk session with this session id
4}.onFailure {
5     Log.e(LOG, "Error getting sandbox session", e)
6}
Creating your first card#
For creating a TunaCard, you should use the session returned by the startSession method and use the method addNewCard. Then, you can
decide whether to inform the CVV parameter or not.
The CVV should be used to create a card that will be used immediately. If the card is only used later, you can save it without the CVV,
then use bind later to get a usable token.
If you want to generate a single-use card, you must set the parameter save as false in the addNewCard method.
1tunaSession.addNewCard(cardNumber = number,
2    cardHolderName = cardHolderName,
3    expirationMonth = month,
4    expirationYear = year)
5    .onSuccess { tunaCard ->
6         //Here is your tuna card
7    }
8    .onFailure { error->
9        //it fails, you should handle this exception
10    }
1tunaSession.addNewCard(cardNumber = number,
2    cardHolderName = cardHolderName,
3    expirationMonth = month,
4    expirationYear = year,
5    save = false)
6    .onSuccess { tunaCard ->
7         //Here is your tuna card
8    }
9    .onFailure { error->
10        //it fails, you should handle this exception
11    }
1tunaSession.addNewCard(cardNumber = number,
2    cardHolderName = cardHolderName,
3    expirationMonth = month,
4    expirationYear = year,
5    cvv = "000")
6    .onSuccess { tunaCard ->
7         //Here is your tuna card
8    }
9    .onFailure { error->
10        //it fails, you should handle this exception
11    }
1tunaSession.addNewCard(cardNumber = number,
2    cardHolderName = cardHolderName,
3    expirationMonth = month,
4    expirationYear = year,
5    cvv = "000",
6    save = false)
7    .onSuccess { tunaCard ->
8         //Here is your tuna card
9    }
10    .onFailure { error->
11        //it fails, you should handle this exception
12    }
Binding a card with CVV#
1tunaSession.bind(card = card, cvv = cvv)
2.onSuccess { card ->
3    //your card is ready to be used for an actual purchase
4}
5.onFailure {
6    //it fails, you should handle this exception
7}
Getting the list of saved cards#
1tunaSession.getCardList()
2.onSuccess { cards ->
3   //those are your cards, don't forget to bind them before using them
4}
5.onFailure { error ->
6   //it fails, you should handle this exception
7}
Removing a card#
1tunaSession.deleteCard(card = card)
2.onSuccess {
3    //Card removed
4}
5.onFailure {
6    //it fails, you should handle this exception
7}
1tunaSession.deleteCard(token = "<card token>")
2.onSuccess {
3    //Card removed
4}
5.onFailure {
6    //it fails, you should handle this exception
7}
What's next?#
Once you have your account and your integration concluded, you can start the setup up of your connections and flows in Console. For further details, please check out the Console section.
