
Tuna plugin for Magento#
The Tuna plugin for Magento allows your store to accept payment without redirecting your customers to external pages. This customer experience increases the conversion rates since customers feel safer when they have a seamless payment journey at the checkout.
Tuna's plugin for Magento is PCI compliant, which means Tuna is certified with rigorous security standards when dealing with card data.
Plugin Download#
The plugin is compatible with Magento 2. Therefore you have to ensure you have installed the latest version to get started with Tuna on your Magento website. You can install the Tuna plugin with a ZIP file or Composer.
Plugin Installation with ZIP file#
Go Tuna's Magento GitHub repository#
Click on "Code" and then "Download ZIP".
Unzip the ZIP file#
You must unzip the file in the directory:
Enable the module#
Run:
Apply database updates#
Run:
Flush the cache#
Run:
In production, please, use the option:
--keep-generated option
Plugin Installation with Composer#
Install the Composer module#
Run:
Enable the module#
Run:
Apply database updates#
Run:
Flush the cache#
Run:
In production, please, use the option:
--keep-generated option
Plugin Settings#
Once you have your Tuna plugin installed, go to:
- Stores > Sales > Payment Method > Other Payment Methods
On the Settings page, in "Tuna Keys" section, you have to provide your AppKey and your Account provided by Tuna. They are available in the Account Settings section in the Developer tab in the Console.
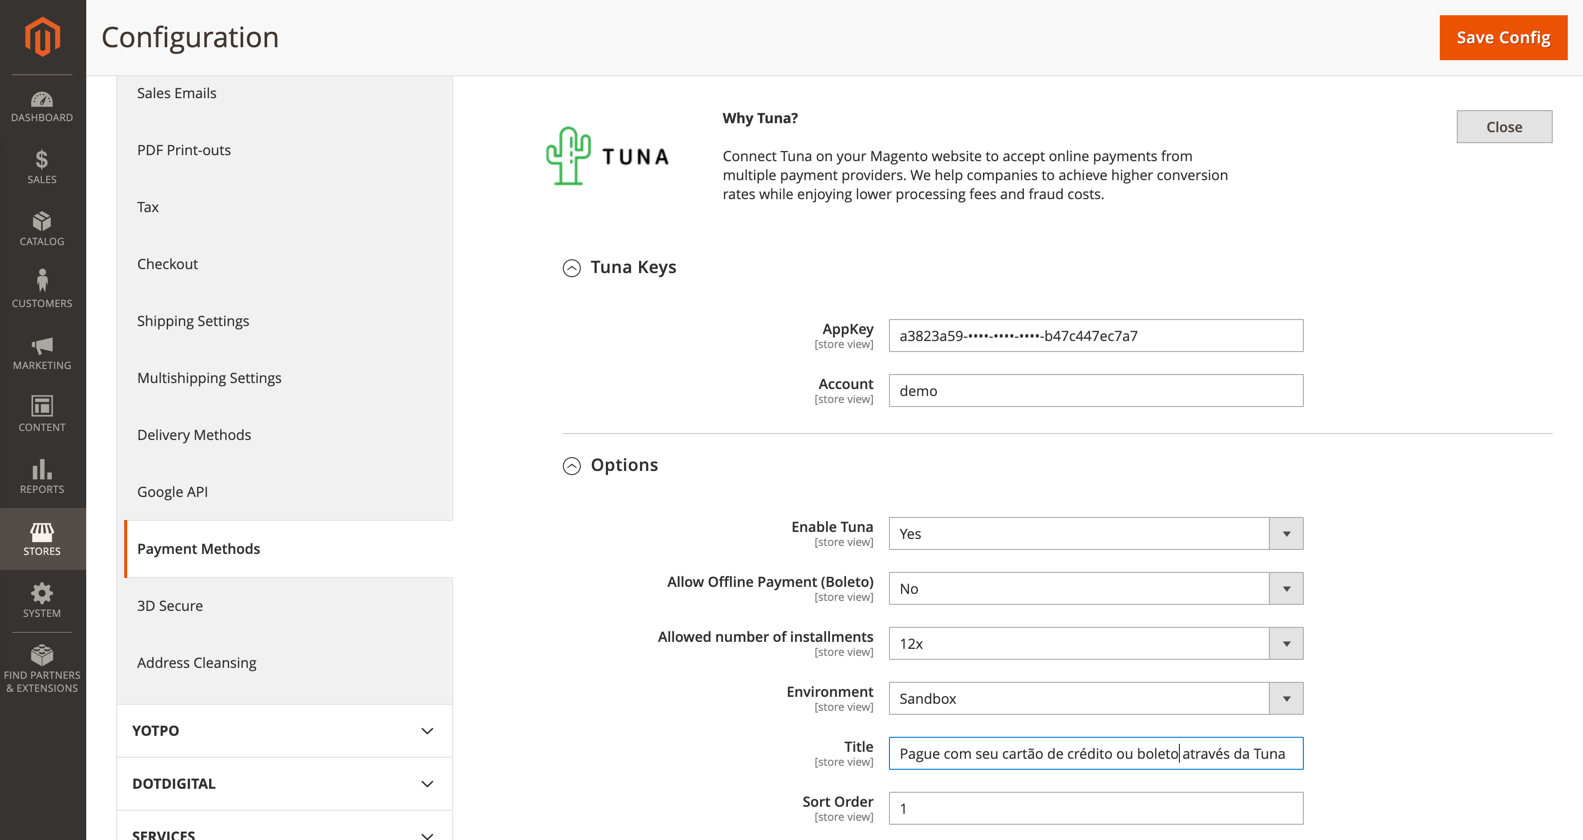
You also have to define the payment option details. Finally, click on "Save Config" to submit the setup.
note
Don't you have a Tuna Account? Click here to start your registration at Tuna.
What's next?#
Once you have your account and your integration concluded, you can start the setup up of your connections and flows in Console. For further details, please check out the Console section.